
Laptop HN-210 Hookup
To hook up the HN-210 Radio to the computer/laptop.
- Connect “A” of figure 1 to the “A” of Figure 2.
- Connect “B” of Figure 2 to the “B” of Figure 3.
- Connect “C” of Figure 3 to the “C” of Figure 4.
- Connect “D of Figure 4 to the “D” of Figure 4.
If you do not have the Serial Cable that is in Figure 3, you can connect “B” of Figure 2 to the “C” of Figure 4 (bypass the serial cable of Figure 3).

Figure 1, Laptop

Figure 2, USB to Serial Device

Figure 3, Serial Cable
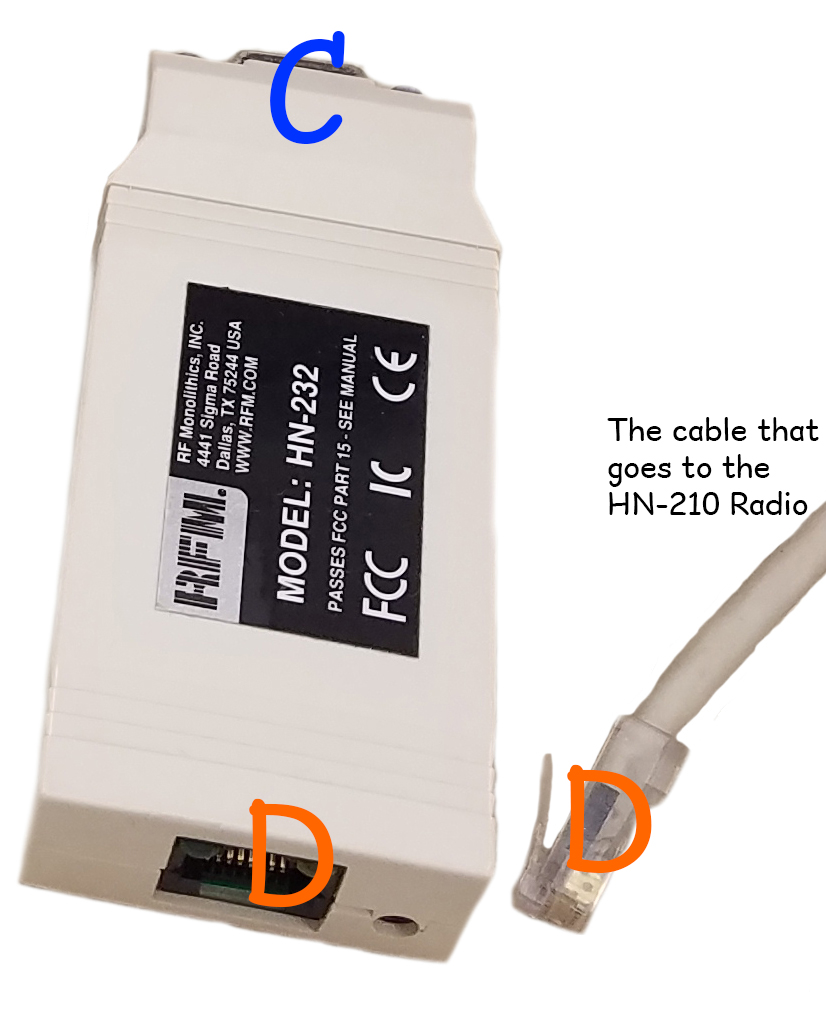
Figure 4, HN-232 Device
You will need the device drivers for the USB to Serial device installed onto the computer.
If you are using KeySpan device that is pictured above, you can download the driver for Windows XP here and Windows 7, 8, and 10 here.
Once everything is connected (and the device drivers are installed for the USB to Serial device) you will need to perform the following steps:
1. On your keyboard hold the Windows Key down (the key that looks like the Windows Logo and is normally by the ALT key). While holding down the Windows Key press the R key.
2. The RUN window should pop up.
3. Type in devmgmt.msc and then click OK.
4. Scroll to and open “Mice and other pointing devices” and if “Microsoft Serial Ballpoint” appears in the list, right click on it and choose “disable” do not choose uninstall (the radio device will not appear elsewhere in device manager).
5. Scroll to and open Ports (COM and LPTs) and look for the devices that have a COMport associated with it (COM1). If more than one, make note of them as you may use them in testing.
6. Open the sign software and open Options, Software Configuration.
7. Change the COM Port Speed to 57600 Baud. This may need to be changed if you are not able to connect, will try that later (other speeds that are common are 38400, 19200 and 9600).
8. Change the COM Port to the number that you found in step number 5.
9. Click on OK at the top.
10. Click on Options then Communications.
11. If the communications still fails, click through the errors and reopen Options and Software Configurations window.
12. Change the COM Port Speed to 38400. Click OK at top. Click Options then Communications. If it fails you may need to try each COM Port Speed one at a time. 57600, 19200, 9600, 4800, 2400 or 1200 Baud.
13. If you found more that one option in step number five, open the Software Configuration window and change the COM Port to one of the other ports you found in step 5.
14. After changing the COM Port, go to step number 9.